Friday 29 July 2016

How to Create Controller or Link Odoo Website ?


https://dedyyuristiawan.blogspot.com


Hello world. Today I got happy felling but i don't where it come from? Lol just for laugh. So today i am gonna share about controller in Odoo. Actually for the first time i hear that, i don't know what should i do? okay in this time, i will try to make definition from myself, you can make your definition too on the comment bellow, we make definition together.

Controller is class on Odoo that can use for us when we want to make link on website, and then show anything that what we want to show on your website. I hope like that, so i am not give you wrong way. So how to create controller on Odoo? Lets see.

This is my class controller, my function on cons.py file :

import logging
from openerp import SUPERUSER_ID
from openerp import http
from openerp.http import request
from openerp import models, api

class website_qty(http.Controller):
 
    @http.route(['/page/dedy'], type='http', auth="public", website="True")
    def index(self, **post):
        wcl = []
        dedy = request.env['dedy.yuristiawan']
        dy = dedy.search([], state='draft')
        return request.render('dedy_controller.index_assets_frontend_view', {              
            'dedy': dy,
        })

As you can see, i can make conclution for this code :

1. Name of the class, you can create name anything what you want, but in this class we need to declaration first. For declaration you can use this code.

http.Controller

2. Name of the function, as you can see you can create name anything what you want, but in the above of name function you need to declaration your url, some thing like this.

@http.route(['/page/dedy'], type='http', auth="public", website="True")

3. Return , actually for return its not really need similar with on python, but in controller you need to render for show data to xml view. something like this.

return request.render('dedy_controller.index_assets_frontend_view', {              
            'dedy': dy,
        })

dedy_controller is my module, index_assets_frontend_view is my id in xml file, and then the important id dedy is variable that we want to show in xml file or on website.

4. Inside of the function you can do anything what you want. like in my code, i just show data from my model dedy.yuristiawan, and then i set in return on variable dedy.

5. Just it.

And this one its my cons.xml file :

<template id="index_assets_frontend_view">
    <title>Test Input</title>
    <t t-call="website.layout">
        <t t-set="title">Dedy Yuristiawan</t>
            <div class="oe_structure">
                <div class="container">
                    <t t-foreach="dedy" t-as="value">
                        <td class="brctbl-col4 js_loc">
                            <p>
                                <t t-esc="value.name"/>
                            </p>
                        </td>
                    </t>
                </div>
            </div>
    </t>
</template>

As you can see, i can make conclution for this code :

1. Template id, its really important for controller, cause usually function on controller bring value to xml with calling template name. See my conclution cons.py file number three.

<template id="index_assets_frontend_view">

2. As you can see i do looping with variable dedy, this variable is from function controller that we set on return. You can see, my conclution cons.py file number 3.

<t t-foreach="dedy" t-as="value">

t-as, it means you can you put value dedy to variable value.

3. And last you had variable, you can do anything, show anything to website, with qweb sintax Odoo. like this looping, show field.

looping :

<t t-foreach="dedy" t-as="value">

show value :

<t t-esc="value.name"/>

4. Actually you can make link on xml code, you can use action on form or just (a href) and link will be the call controller function python.

<a t-att-href="'/page/dedy_next_view/" name="dedy_next_id" class="btn btn-default">Go to next link</a>

action="/page/test_input_view_form" method="post"

5. Last one, if you want to make post method, you need to add input like this one.

<input type="hidden" name="csrf_token" t-att-value="request.csrf_token()"/>

This is for security to protect our website, that we need get token from Odoo. This is rule for the Odoo 9.

That's it, you can write comment bellow if you still confuse about my code. i hope this can help you little bit. Ahha
Share:

How to Inherit Function Odoo ?


https://dedyyuristiawan.blogspot.co.id


Hello wold. Today i got inspiration from my comment's. He just started develop Odoo. You know, actually i am so appreciate that, maybe we feel difficult to learn something new, and we don't have person to help us, just world wide web. I know, because for first time I learn Odoo, i feel so disappointed for myself, I just think 'i can't do it'. But i keep learn Odoo, cause i am still work with company use Odoo aha. But huyaa for time by time i can learn the process Odoo, new syntax from python, qweb, or maybe js, css, etc cause my background its not from website. And you know, now i am realise that how's can develop Odoo is easy, i am so realise that. Just little bit share my misery. Lol

So just go ahead right? today i am gonna share about how to inherit function Odoo, for example in this post i will inherit function create. Just for note, function create is automatically create when we develop view form or tree. Aha you know function create in base Odoo, it always have the name 'create'. And usually have one parameter is self or two parameter is self, vals (variable that we have). For example in Odoo base, we have create like this.

@api.model
def create(self, vals):
    .
    .
    .
    .
    return A

As you can see create have two variable, self and vals. And now i want to inherit that. see my code.

class AddFieldProduct (models.Model):
    _inherit = "product.template"    
 
    info = fields.Char('Info') 

    @api.model
    def create(self, vals):
        if self.info :
            self.info = 'is a field info'
        return super(AddFieldProduct, self).create(vals)

as you can see, the requirement is :

1. We need to create file something like me, i create file inherit_function.py and then we need to create class like 'class inherit_function (models.Model)' and type class 'model'.

2. Declaration class with _inherit = "product.template", it mean we want to inherit model product.product.

3. Write name and parameter, similar with function, see def create(self, vals) and add @api.model above the function.

4. Add what you what you want need. Like this one i just want to set field info is 'is a field info'. if self.info : self.info = 0

5. And last add return with super like this one, return super(inherit_function, self).create(vals). inherit_function is a my class, see on the top.

7. When we inherit create like that, we put there condition on the function, field info will save 'is a field info' in database. trust me.

6. That's it, easy right? 

So the conclusion is Semangat!! like my boss always say to me, when i got problem with my code. Lol


Share:

Wednesday 27 July 2016

How to add or Ihherit Action on Odoo ?


https://dedyyuristiawan.blogspot.com
Action Odoo


Hello world. Today i've new knowledge about develop Odoo. do you ever see action in odoo, some thing like picture on top, beside print? its action, and now i will share how to inherit or add action on odoo. let's do this.

Actually its very simple, like you inherit field or another view. in this case, i just add xml file that inherit to parent. This is my xml file.

<record model="ir.values" id="set_efaktur">
    <field name="name">My Action</field>
    <field name="value" 
    eval="'ir.actions.act_window,' + str(ref('wizard_action'))" />
    <field name="key">action</field>
    <field name="model">dedy.yuristiawan</field>
</record>

You can read this description :

1. As you can see i set record in the ir.values. and then i put name My Action.
2. And then in the value i just set value, and eval ("'ir.actions.act_window,' + str(ref('wizard_action'))") it will be show my wizard. wizard_action is name of wizard template.
3. Next line i just declaration key with action.
4. And the last, this is really important, i put my action in the my custom model dedy.yuristiawan.
5. Just it

Huya, simple right? so this is post about inherit or add new action in Odoo, if you still confuse about my code you can fill comment bellow. I hope this is can help you. See yaa
Share:

Tuesday 26 July 2016

How to get Data from JSON Show on List Android


https://dedyyuristiawan.blogspot.com

Hello world, today I am gonna share about get data from the JSON. In this case I will use volley library for make easy develop, when i get data from JSON. Actually this is test for myself, to remain me about android code. And this is my list :

1. A Activity have one button, two edit text.
2. When your click button will move to another activity, I call it Activity B, Activity B will show list data from JSON.
3. When you click your list, it will will be back to Activity B with fill two EditText.
4. Just it.

Hoya, in this tutorial i use JSON from androidhive. You can check here. He share about JSON too but in this post i will make it complete :D.

Now you follow my step by step :

1. Activity A 

In this Activity A I just put One Button and with Two EditText this is my activity_main.xml file :

<RelativeLayout xmlns:android="http://schemas.android.com/apk/res/android"
    xmlns:tools="http://schemas.android.com/tools"
    android:layout_width="match_parent"
    android:layout_height="match_parent" >

    <Button
        android:id="@+id/btnArrayRequest"
        android:layout_width="wrap_content"
        android:layout_height="wrap_content"
        android:layout_centerHorizontal="true"
        android:layout_marginTop="50dp"
        android:paddingLeft="15dp"
        android:paddingRight="15dp"
        android:text="Pick Doctor" />

    <EditText
        android:id="@+id/ETCode"
        android:layout_width="wrap_content"
        android:layout_height="wrap_content"
        android:layout_centerHorizontal="true"
        android:layout_marginTop="50dp"
        android:paddingLeft="15dp"
        android:paddingRight="15dp"
        android:layout_below="@id/btnArrayRequest"
        />

    <EditText
        android:id="@+id/ETName"
        android:layout_width="wrap_content"
        android:layout_height="wrap_content"
        android:layout_centerHorizontal="true"
        android:layout_marginTop="50dp"
        android:paddingLeft="15dp"
        android:paddingRight="15dp"
        android:layout_below="@id/ETCode"
        />

</RelativeLayout>

and this is my MainActivity.java file :


public class MainActivity extends Activity {
 
 private static String TAG = MainActivity.class.getSimpleName();
 private Button btnMakeArrayRequest;
 private EditText ETCOde;
 private EditText ETName;

 @Override
 protected void onCreate(Bundle savedInstanceState) {
  super.onCreate(savedInstanceState);
  setContentView(R.layout.activity_main);

  btnMakeArrayRequest = (Button) findViewById(R.id.btnArrayRequest);
  ETCOde = (EditText)findViewById(R.id.ETCode);
  ETCOde.setEnabled(false);
  ETName = (EditText)findViewById(R.id.ETName);
  ETName.setEnabled(false);
  btnMakeArrayRequest.setOnClickListener(new View.OnClickListener() {

   @Override
   public void onClick(View v) {
    Intent intent = new Intent(MainActivity.this,
MainActivityList.class);
    startActivity(intent);
   }
  });
  if (getIntent() != null){
   if (getIntent().hasExtra("Code")) {
    ETCOde.setText(getIntent().getStringExtra("Code"),                                 TextView.BufferType.EDITABLE);
   }
   if (getIntent().hasExtra("Name")) {
    ETName.setText(getIntent().getStringExtra("Name"),                                 TextView.BufferType.EDITABLE);
   }
  }
 }
}

See on my first list, function button its for move to Activity B. You can see on this code :

btnMakeArrayRequest.setOnClickListener(new View.OnClickListener() {
   @Override
   public void onClick(View v) {
      Intent intent = new Intent(MainActivity.this,
                        MainActivityList.class);
      startActivity(intent);
   }
});

And then as you can see in the third my list it must fill data from list Activity B.  I just use this code:

if (getIntent() != null){
    if (getIntent().hasExtra("Code")) {
      ETCOde.setText(getIntent().getStringExtra("Code"), 
      TextView.BufferType.EDITABLE);   
    }
    if (getIntent().hasExtra("Name")) {
      ETName.setText(getIntent().getStringExtra("Name"), 
      TextView.BufferType.EDITABLE);   
    }
}

This condition for detection if this activity get intent for another activity.

2. Activity B

Remember in this activity it's our main point. We will show data from JSON and will be show on list activity. So this is my activity_main_list.xml and list_item.xml file.

<RelativeLayout xmlns:android="http://schemas.android.com/apk/res/android"
    xmlns:tools="http://schemas.android.com/tools"
    android:layout_width="match_parent"
    android:layout_height="match_parent" >

    <ListView
        android:layout_width="match_parent"
        android:layout_height="match_parent"
        android:id="@+id/list"
     />

</RelativeLayout>

<?xml version="1.0" encoding="utf-8"?>
<RelativeLayout xmlns:android="http://schemas.android.com/apk/res/android"
    android:layout_width="match_parent"
    android:layout_height="match_parent"
    android:orientation="vertical" >
    
    <TextView 
        android:layout_width="wrap_content"
     android:layout_height="50dp"
     android:id="@+id/name"
     android:layout_alignParentStart="true"
  android:gravity="center_vertical"  
        android:paddingStart="10dp"
 />
    
    <TextView 
  android:layout_width="wrap_content"
  android:layout_height="50dp"
     android:id="@+id/code"
  android:gravity="center_vertical"  
     android:layout_alignParentEnd="true"
        android:paddingEnd="10dp"
    />

</RelativeLayout>

In this xml file list we need to add item list for set list in xml file list. I mean element list have item list.

So this is my MainActivityList.java file in Activity B


public class MainActivityList extends Activity{

   public ListView list;    
   public ArrayList doc = new ArrayList();    
   public ListAdapter adapter;
   private String urlJsonArry = "http://192.168.88.10/api/medikav1/specialization";   private static String TAG = MainActivity.class.getSimpleName();
      
   @Override   
   protected void onCreate(Bundle savedInstanceState) {
      super.onCreate(savedInstanceState);      
      setContentView(R.layout.activity_main_list);      
      makeJsonArrayRequest();
      list = (ListView) findViewById(R.id.list);
      adapter = new ListAdapter(this);
      list.setAdapter(adapter);
      list.setOnItemClickListener(new AdapterView.OnItemClickListener() {
        
   @Override
   public void onItemClick(AdapterView parent, View view, int position, long id) {
      Intent intent = new Intent(MainActivityList.this, MainActivity.class);             intent.putExtra("Code", doc.get(position).name);
      intent.putExtra("Name", doc.get(position).code);
      intent.setFlags(Intent.FLAG_ACTIVITY_NEW_TASK | 
                      Intent.FLAG_ACTIVITY_CLEAR_TASK);
      startActivity(intent);
      }
      });
   }

   private void makeJsonArrayRequest() {

      JsonArrayRequest req = new JsonArrayRequest(urlJsonArry,
            new Response.Listener() {
               @Override               
               public void onResponse(JSONArray response) {
                  Log.d(TAG, response.toString());
                  try {
                     for (int i = 0; i < response.length(); i++) {
                        JSONObject person = (JSONObject) response.get(i);
                        Model add=new Model();
                        add.name = person.getString("SpecializationID");                                   add.code = person.getString("SpecializationName");                                 doc.add(add);
                     }
                  } catch (JSONException e) {
                     e.printStackTrace();
                     Toast.makeText(getApplicationContext(),                                                           "Error: " + e.getMessage(),                                                        Toast.LENGTH_LONG).show();
                  }
               }
            }, new Response.ErrorListener() {
         @Override
         public void onErrorResponse(VolleyError error) {
            VolleyLog.d(TAG, "Error: " + error.getMessage());
            Toast.makeText(getApplicationContext(),
                  error.getMessage(), Toast.LENGTH_SHORT).show();
         }
      });
      AppController.getInstance().addToRequestQueue(req);   }

}

The point of this activity is i create function for get data from Json. This is my function.


private void makeJsonArrayRequest() {

   JsonArrayRequest req = new JsonArrayRequest(urlJsonArry,
         new Response.Listener() {
            @Override               
            public void onResponse(JSONArray response) {
               Log.d(TAG, response.toString());
               try {
                  for (int i = 0; i < response.length(); i++) {
                     JSONObject person = (JSONObject) response.get(i);
                     Model add=new Model();
                     add.name = person.getString("SpecializationID");                                   add.code = person.getString("SpecializationName");                                 doc.add(add);
                  }
               } catch (JSONException e) {
                  e.printStackTrace();
                  Toast.makeText(getApplicationContext(),                                                           "Error: " + e.getMessage(),                                                        Toast.LENGTH_LONG).show();
               }
            }
         }, new Response.ErrorListener() {
      @Override
      public void onErrorResponse(VolleyError error) {
         VolleyLog.d(TAG, "Error: " + error.getMessage());
         Toast.makeText(getApplicationContext(),
               error.getMessage(), Toast.LENGTH_SHORT).show();
      }
   });
   AppController.getInstance().addToRequestQueue(req);   
}

As you can see I use volley for get data Json with parameter urlJsonArry.


   JsonArrayRequest req = new JsonArrayRequest(urlJsonArry, new Response.Listener()
   String urlJsonArry   = "http://api.androidhive.info/volley/person_array.json"

.As i told you before, i use JSON data from android hive, you can check here. You can goto link JSON, If you want see, it would be like this.


[
 {
 "name" : "Ravi Tamada", 
 "email" : "ravi8x@gmail.com",
 "phone" : {
  "home" : "08947 000000",
  "mobile" : "9999999999"
 }
 },
 {
 "name" : "Tommy", 
 "email" : "tommy@gmail.com",
 "phone" : {
  "home" : "08946 000000",
  "mobile" : "0000000000"
 }
 }
]

You can see I am do looping and set data to my model class. And then I do add to array list with type data model. After that you can see when i set array list into list xml with this code. This is in my ListAdapter.java file.

public class ListAdapter extends BaseAdapter {
   
   MainActivityList main;
      
   ListAdapter(MainActivityList main)
   {
      this.main = main;
   }
   
   @Override
   public int getCount() {
      return  main.doc.size();
   }
 
   @Override
   public Object getItem(int position) {
      return null;   }
 
   @Override   public long getItemId(int position) {
      return 0;   }
   
   static class ViewHolderItem {
      TextView name;
      TextView code;
   }

   @Override   
   public View getView(int position, View convertView, ViewGroup parent){
      ViewHolderItem holder = new ViewHolderItem();

      if (convertView == null) {
          LayoutInflater inflater = (LayoutInflater) 
          main.getSystemService(Context.LAYOUT_INFLATER_SERVICE);
            convertView = inflater.inflate(R.layout.list_item, null);                          holder.name = (TextView) convertView.findViewById(R.id.name);           
            holder.code = (TextView) convertView.findViewById(R.id.code);                      convertView.setTag(holder);
      }
      else
      {
          holder = (ViewHolderItem) convertView.getTag();
      }
      
      holder.name.setText(this.main.doc.get(position).name);
      holder.code.setText(this.main.doc.get(position).code);
 
   return convertView;
  }
}

after adapter have value, this adapter will be add to list :


adapter = new ListAdapter(this);
list.setAdapter(adapter);

And the last remember my third list. List will move back to activity A, with fill 2 EditText. I just use this code.


list.setOnItemClickListener(new AdapterView.OnItemClickListener() {
   @Override
   public void onItemClick(AdapterView parent, View view, int position, long id) {
 Intent intent = new Intent(MainActivityList.this, MainActivity.class);
 intent.putExtra("Code", doc.get(position).name);
 intent.putExtra("Name", doc.get(position).code);
 intent.setFlags(Intent.FLAG_ACTIVITY_NEW_TASK | 
                        Intent.FLAG_ACTIVITY_CLEAR_TASK);
 startActivity(intent);
 }
});

As you can see, I just use intent and bring data from array list with position. Then with the array list type data model I just add .name or .code it's a getter from model class. Uha

The conclusion is if you have text like this, you can make plan one by one. Like my plan is button click, get data Json, set data Json to list, and onclick list. Hoya you can also download to my GitHub repository with click link below.

GitHub
Share:

Monday 25 July 2016

How to make sequence name Odoo


http://dedyyuristiawan.blogspot.com


Hello world. Today i am gonna share about little trick in Odoo, this is a how to make field name sequence. Actually its basic from Odoo, but i just know when i got task like that. Lol. So just follow my step by step.

1. Declaration code for sequence

For declaration sequence i create xml file like this. the code is test.dedy.yuristiawan, prefix DY, padding is 5, and it would be like this 'DY00001'. Prefix is for first char (DY) and padding is for long number (00001). You can call this sequence with test.dedy.yuristiawan. See this code

  <?xml version="1.0" encoding="utf-8"?>  
  <openerp>  
    <data noupdate="1">  
      <record id="seq_test_dedy_yuristiawan" model="ir.sequence">  
        <field name="name">Test Dedy Yuristiawan</field>  
        <field name="code">test.dedy.yuristiawan</field>  
        <field name="prefix">DY</field>  
        <field name="padding">5</field>  
        <field eval="1" name="number_increment"/>  
      </record>  
    </data>  
  </openerp>  

and then i put this code in test_dedy_yuristiawan.xml

2. Override Function set Field Name, before Create.

Yap, now i override create function like this. This code i set field name readonly=True (anybody can't change) and call  self.env['ir.sequence'].next_by_code('test.input.machine') that i create in xml file. If you don't know about override function i will create specially post for How to Override Function in Odoo in the next post.

name = fields.Char('Code Dedy', readonly=True)

@api.model
def create(self, vals):
    print "+++++++++++++++++++++++++++++++++++++++++++++++++"
    print "prepare inherit create function"
    print "change the name TI with sequence"
    vals['name'] = self.env['ir.sequence'].next_by_code('test.input.machine')
    print "Inherit complete"
    print "+++++++++++++++++++++++++++++++++++++++++++++++++"
    return super(test_input_machine, self).create(vals)


3. Declaration xml file into __openerp__.py

Last step don't forget to declaration xml file to __openerp__.py

'data'          : [
                         'data/test_dedy_yuristiawan.xml',

That it, i hope this is can help you little bit, so if you still confuse about my code, you fill comment bellow and i will try to help you later. Thanks.


Share:

Saturday 23 July 2016

Installation Odoo on Mac OS X Error Could not execute command 'lessc'


https://dedyyuristiawan.blogspot.co.id


Hello world. As you know before i create this post, i did post about installation on mac with bitnami version and home-brew. There so many difference between bitnami and home-brew, you can check on my previous post. So when i install Odoo with home-brew, i got a one problem. You can see in this post.

The problem is my library python not complete to run Odoo, as you can see the problem is "Could not execute command 'lessc' ", i just need to install less in my python library. so i going to find solution on google. And finally i got solution to make Odoo on my mac with this command ( type without  $ ).

$ brew update
$ brew uninstall node
$ brew install node
$ sudo brew postinstall node

so first step i just need to update my brew, and uninstall node that i ever install, and then install node again, i make force to post install node. I hope this post can help you and see you.
Share:

How to Install Odoo On Mac with Packages Homebrew


https://dedyyuristiawan.blogspot.co.id


Hello world. How are you today ? Are want to install odoo 9 on mac with packages home-brew,  now you can make it happen in your mac. Just do my step by step and i will give you perfect way to get odoo in your mac. In this post i will show you how to install odoo on mac with packages homebrew. Iam so really interested talk about home-brew cause with this packages we can do anything like we use linux on your mac. 

As you know home-brew is a "the missing packages for os x". With Homebrew we can install packages in the console as we can in the most Linux distributions. So first step you need install with this command in your console (terminal) :

1. Install Homebrew  :


  ruby -e "$(curl -fsSL https://raw.githubusercontent.com/Homebrew/install/master/install)"

2. Install Python with Brew

After this we can install Python. If you already did this with a downloaded installer you can skip installing Python with Homebrew but I cannot guarantee for that. If you have problems then uninstall Python and try the package from Homebrew. To install run and follow the instructions:


  brew update
  brew install python

3. Install PostgreSQL

Now we have installed Python. Next we need the PostgreSQL server. Here we can also use Homebrew:

  brew install postgresql

remember if you have already odoo on your mac, using this command first before you run odoo. To start the PostgreSQL right now and automatically at system startup we run:

4. Install some Dependencies for the Pillow module

  brew install freetype jpeg libpng libtiff webp xz

5. Install Dependencies Python Module for Odoo

Next we can decide how to install the Python dependencies for odoo. One way is to install these globally. If you developing on other Python applications you sometimes need the same Python packages but in different versions. Or you want to let the system clear and remove these easy when you do not need them anymore. To get these advantages we can create a virtual environment for Python. This virtual environment copies Python and some other files (like pip) to a specified directory (e.g. in your home path) and provides a script which rewrites the path to use the Python from this directory.

To install the Python dependencies we use pip which is package manager for Python (like Homebrew but for Python modules) and is already installed with Python. For creating the virtual environment we have to install virtualenv. Homebrew does not contain virtualenv so we install it with pip (globally):

  pip install virtualenv

Now we can create the virtual environment. We use for this the directory odoo-env in our home directory:

  virtualenv ~/odoo-env

With this command all necessary files were copied to this directory. Next we enter the created virtual environment:

  . ~/odoo-env/bin/activate

Okay, all looking the same as before? :) We can look if we are in this virtual environment:

  which python
  /Users/youruser/odoo-env/bin/python

As you can see the Python binary from this directory is used. If you want to leave this environment you can type deactivate or close the terminal. Be aware that if you open a new tab or reopen the terminal you are not in the environment. Here you have to run the activate script as before.

Now we can start installing all dependencies for odoo. Download odoo if you did not have (e.g. clone the git repository) . In the newer odoo versions there is a requirements.txt file which contains all dependencies. To install these you have to change to the odoo directory (with cd) and run (you have to be in your virtual environment):

  pip install -r requirements.txt

if you get some text like this, you should be happy. Lol

  Successfully installed [...]
  Cleaning up...

You have installed all dependencies. Now you can start odoo with this command :

  python ./odoo.py

and will show like this.

2014-12-16 09:52:28,172 2974 INFO ? openerp: OpenERP version 8.0
2014-12-16 09:52:28,172 2974 INFO ? openerp: addons paths: ['/Users/youruser/Library/Application Support/Odoo/addons/8.0', u'/Users/youruser/odoo/openerp-v8/openerp/addons', u'/Users/youruser/odoo/openerp-v8/addons']
2014-12-16 09:52:28,172 2974 INFO ? openerp: database hostname: localhost
2014-12-16 09:52:28,172 2974 INFO ? openerp: database port: 5432
2014-12-16 09:52:28,172 2974 INFO ? openerp: database user: youruser
2014-12-16 09:52:28,328 2974 INFO ? openerp.service.server: HTTP service (werkzeug) running on 0.0.0.0:8069
2014-12-16 09:53:32,095 2974 INFO ? openerp.addons.bus.bus: Bus.loop listen imbus on db postgres
…

Then you can open your browser and open http://localhost:8069 .

Here you can create a new database with or without demo data and playing/developing with odoo. If you done you can stop with CTRL+C in your console.

Now you can create database, user name and password for do development in first user interface. After you have done with first set up, you will meet the backend UI Odoo 9.


https://dedyyuristiawan.blogspot.co.id

You can install all apps that you want or you want to develop custom module for Odoo 9. But remember as you can see, we run with python so you need to start and restart when you want run or stop Odoo.

For start service you can use this command :

  virtualenv ~/odoo-env
  . ~/odoo-env/bin/activate
  ./odoo.py

Actually when i was install Odoo on mac, i have so many problem so if you have problem you can write comment bellow and i will help you as i can.


Share:

Wednesday 20 July 2016

How to Install Odoo on Mac OS X with Bitnami Version


https://dedyyuristiawan.blogspot.com


Hello world. Today my friends confuse about how to install odoo on Mac operating system. So this post i will show you, how to install odoo on Mac operating system? Sometimes we meet a problem about develop, learning or use a software, cause we just have one computer or one operating system. Like this case, we want to install odoo on mac. Actually odoo is made for linux operating system, mostly developer use linux for develop with odoo cause it can be fast to develop. But how about the other, like my friend. He is a business analyst, he just one laptop. Its mac, so that why the creative developer help us to use software run with different platform. 

When i search on google, i found a lot how to install odoo on mac but with different way, i found 2 option how to install odoo on mac. This is my option.

1. Odoo Bitnami version

This one is very easy to install, like you want install application. People say that this one is runs slow, but i have different opinion. Its good product, and good way for their don't need know about code. This one is not runs slow, cause we want to install in good product too like mac. right? yap that why i suppose you if you have mac and you are won't develop odoo, you can pick this option.

2.  Odoo with add Library

This one is real odoo. So how to install it? Cause you know mac dont have library like python, postgre etc. So we need to add this library to our mac. This one usually use for a engineer, that they want a develop or just test in different os. Actually this one is really made for engineer that we want to develop odoo with fast. So if you are a engineer, i suppose you to install odoo with this option. 

Now we know the different odoo in mac, for this post i will show you how to install odoo with bitnami version on mac operating system. For option two, its how to install odoo with add library, i will show in the next post.  Don't worry, lets do this.

You can download odoo 9 bitnami version in this link Bitnami.com, you can choose Odoo 9 cause is new, is recommended for you. After you downloaded, you can click the dmg file and will show like this picture.


http://dedyyuristiawan.blogspot.co.id

First U/I Installation Odoo, just click the icon and if you meet like bellow picture ( permission from Mac OS ) just click open, cause i trust, i want to develop odoo. How about you? whatever 

http://dedyyuristiawan.blogspot.co.id

First U/I Installation Odoo just click next.

http://dedyyuristiawan.blogspot.co.id

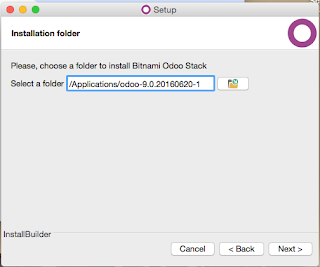
This is location when we want to put odoo application. I prefer to not rename this one, cause i just want default settings from the developer. After that you can click next.

http://dedyyuristiawan.blogspot.co.id

This one use for login Odoo, so you can fill you email and password.  After that you can click next.

http://dedyyuristiawan.blogspot.co.id

This is settings configuration for email, i just not check this one, because i don't need this. Whatever about you, if you want odoo can sent email in the future you can check this one. After that you can click next.

http://dedyyuristiawan.blogspot.co.id

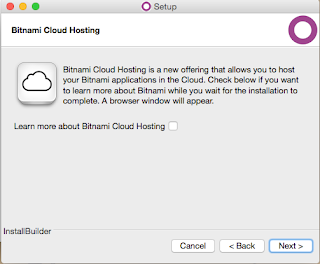
This is settings for put our website to cloud. Just click next.

http://dedyyuristiawan.blogspot.co.id

Installation process running.  After that you can click next.

http://dedyyuristiawan.blogspot.co.id

Just click next again, if installation process complete.

https://dedyyuristiawan.blogspot.co.id


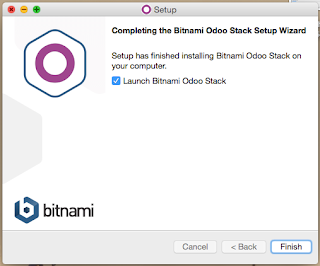
Last step click button launch, and odoo will show in your browser.

https://dedyyuristiawan.blogspot.co.id


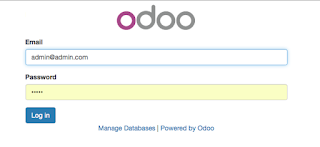
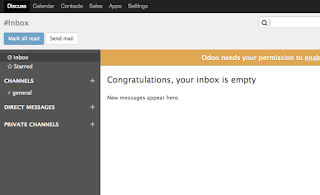
You can fill user name and password like you did in installation step. Just click login and you will see the first user interface odoo.

https://dedyyuristiawan.blogspot.co.id


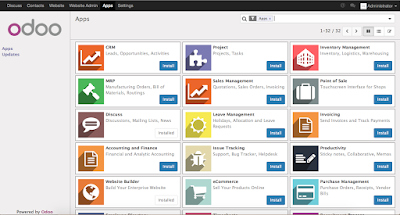
If you want to istall application or module you just click and install it, when you want uninstall you just pick applcation or module and then click uninstall.

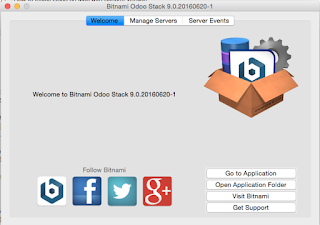
So where is the odoo aplication? What about i want to start Odoo for first time? Odoo application will saved in Application/(odoo folder like you write in installation). If you want run do again just open application :

https://dedyyuristiawan.blogspot.co.id


a. Odoo Folder and click (Manager-OS X) 
b. Select tab Manage Sever 
c. Start All Server 
d. Open your browser and type http://localhost:8080/web/login

or 

a. Odoo Folder and click (Manager-OS X) 
b. Select tab Welcome
c. Go to Application
d. Start Server and Odoo will automatically launch in your browser.

So the conclusion is pick the one want you want to use, ask your self what you need? If you have question, you can write comment bellow, i will help you if i can. Lol.
Share:

Sunday 17 July 2016

How to Call Wizard from XML Button Odoo

Hello world. Wizard is important if you want to develop odoo, wizard is something like pop up will show when you have action. With wizard you can make form or just information that you want to show. Okay, at first i wanna show you how to call wizard form xml button. And the next i will show you how to make wizard in odoo. Lets make it happen.

This is my code for call wizard from button.

<button
       type="action"
       name="%(split_wo.action_view_wizard)d"
       string="Finished"
       class="oe_highlight"
       help="Finish Order"/>

in this code the important is name, as you can se split_wo.action_view_wizard, so split_wo is module where is the wizard, and action_view_wizard is name of the wizard. Simple right? that's it. So if you have question, you can write comment bellow, don't worry i will help you if i can. I hope this is can help you for little bit. lol
Share:

Saturday 16 July 2016

Encryption Description String with AES Python


https://dedyyuristiawan.blogspot.com


Hello world. Today i am gonna show you how to encryption and descryption string with AES. Today i've task to create link odoo with encryption, so automatically i must create decryption too. On this case i just use AES for encryption and decryption data, cause i think AES is the best algorithm encryption for now.

Here we go, this is my python function to encryption and decryption data. You can check it, if get wrong with my code. Lol

    def _default_key(self):
        default_key = b'no surprises guy'
        return default_key

    def _key(self, key):
        if len(key) >= 32:
            key = key[:32]
        else:
            key = self._pad(key)
        
        return key
    
    def bs(self):
        bs = 32
        return bs
    
    def _encrypt(self, raw, key):
        raw = self._pad(raw)
        iv = Random.new().read(AES.block_size)
        cipher = AES.new(key, AES.MODE_CBC, iv)
        return base64.b64encode(iv + cipher.encrypt(raw))
    
    def _decrypt(self, enc, key):
        enc = base64.b64decode(enc)
        iv = enc[:AES.block_size]
        cipher = AES.new(key, AES.MODE_CBC, iv)
        return self._unpad(cipher.decrypt(enc[AES.block_size:]))
    
    def _pad(self, s):
        s = str(s)
        return s + (self.bs() - len(s) % self.bs()) * chr(self.bs() - len(s) % self.bs())
    
    def _unpad(self, s):
        s = str(s)
        return s[:-ord(s[len(s)-1:])]

Yes, to use this function you just call function _encrypt and _decrypt with the parameter like this.

    self._encrypt("Dedy Yuristiawan", self.key(self._default_key)) # parameter string and key
    self._decrypt(encrypted_data, self.key(self._default_key)) #parameter data encrypted and key

and for now don't forget to import library python on the top.

    from Crypto.Cipher import AES
    from Crypto import Random
    import base64
    from gdata.tlslite.utils.rijndael import encrypt

So the conclusion is use this function if you want to encrypt or decrypt data, if you confuse about my code, you can fill on the comment bellow, i hope this is can help you little bit.
Share:

Need Change GMT with Function Python


https://dedyyuristiawan.blogspot.co.id


Hello world. Today i am gonna show you, how to change time with function. Last post i just share how to show datetime field without wrong show, i just share without create function python. So today i gonna show you change Datetime field with function, sometimes after try any failed solution, we don't have choice to get great solution, we must create function to get great solution.

So for this post i gonna show you function python to change datetime with plus or minus requirement. This is my function python. 

def _add_hour(self, vdate):
    a_time = datetime.strptime(vdate, "%Y-%m-%d %H:%M:%S")
    a_time += timedelta(hours=7)
    b_time = a_time.strftime("%d/%m/%Y %H:%M:%S")
    
    return b_time

In this function i just change time with +7 hour, and after that i change format date like human know, not computer know. Lol.

For my last word, the conclusion is at least we must know how to get the purpose, whatever we chose another way, cause someday we certainly use it.
Share:

Thursday 14 July 2016

How to show Datetime Field in Website / Front end Odoo


https://dedyyuristiawan.blogspot.co.id


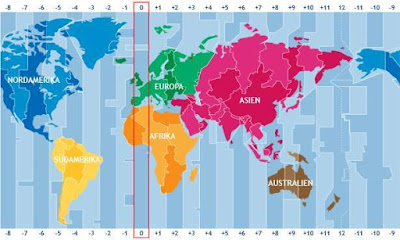
Hello world. Today i've got problem with show field datetime in website. The problem is when you show datetime in website, date will show -7 hour,  +7 hour, etc. This problem is not bugs from Odoo,  cause in database Odoo data will save with GMT+0. Its not bugs, its a rule for the make our set datetime in anywhere easy. How can? yes when you show in backend is normal, datetime will show like your input, but when you want show in website is different, time will - 7 or something like that.

Ok lets make it clear. In this post i just want to show when i got problem with diatomite. Usually when we want to show datetime in website we use code like this. 

<tr t-foreach="split" t-as="line"> # looping model for get field
 <t t-set="no" t-value="no + 1"/>
 <td class="text-center"><span t-esc="no"/></td>
 <td class="text-center"><span t-esc="line.start_date"/></td>
 <td class="text-center"><span t-esc="line.end_date"/></td>
 <td class="text-center"><span t-esc="line.qty"/></td>
</tr>

line.end_date and line.start_date is my field. For the example in the backend i've input with 009-01-05 22:14:39, and when look into database time will save 009-01-05 22:07:39 its less 7 hour. Cause datetime will save with GMT+0. But why when in the backend will show 009-01-05 22:14:39 similar with i'd input in backend, Odoo will automatically convert time when you show in backend with this syntax <field/>. 

<field name="my_datetime"> #my_datetime is my datetime field in Odoo

so, its different when you show in website with syntax on the top or this syntax <span t-esc/>.

<span t-esc="line.end_date"/> #end_date is my datetime field in Odoo

datetime will show similar with database without automatically convert Odoo. In this case you don't need to change with javascript or make function python, you don't need this. Because Odoo have perfect syntax. This is it <span t-field="line.end_date"/> t-field

<span t-field="line.end_date"/> #end_date is my datetime field in Odoo. 

Perfect right, you don't need to make difficult to create function js or python you just need to use <t-field /> and datetime will show like your input (like what's you want). 

So the conclusion is when you want show Datetime field in backend you can use <field name="name_field"/> and different when you want show in website / front end you just use <t-field=name_field/> don't use the other. See yaa
Share:


<br>


Advice for contacting me at dedyy54@gmail.com